These Baskets Are A Perfect Kids Easter Or May Day Craft
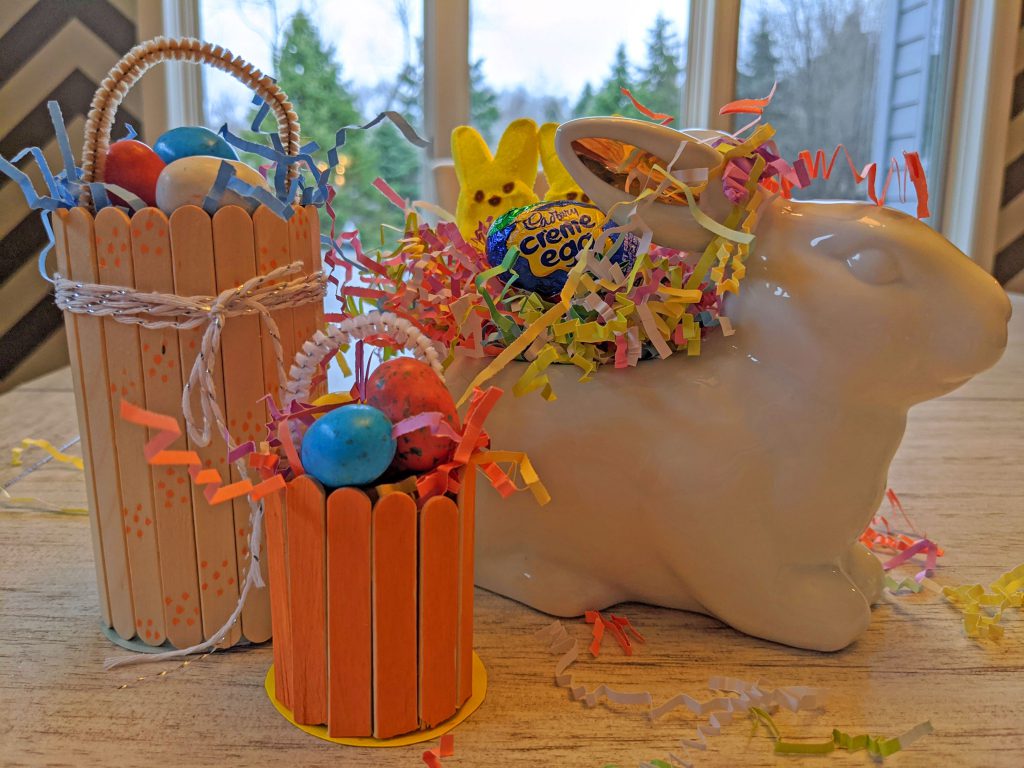
Did Easter sneak up on anyone else?! All this practicing social distancing and getting ready for quaranting myself with two kids under two has left me thinking of pretty much anything but Easter. But now that the quarantine has begun I am desperate to think of ways to keep my kids busy and help pass the time and Easter crafts just might be the ticket.
These adorable baskets will not only help pass the time, but when you’re done you can fill them with tiny adorable trinkets and treats and hand them out to your neighbors, family, and friends (while keeping a safe 6 foot perimeter of course). In fact, why not go May Day style and walk around the neighborhood and drop them off at all your neighbors doors to bring a little ray of joy during this isolating time.
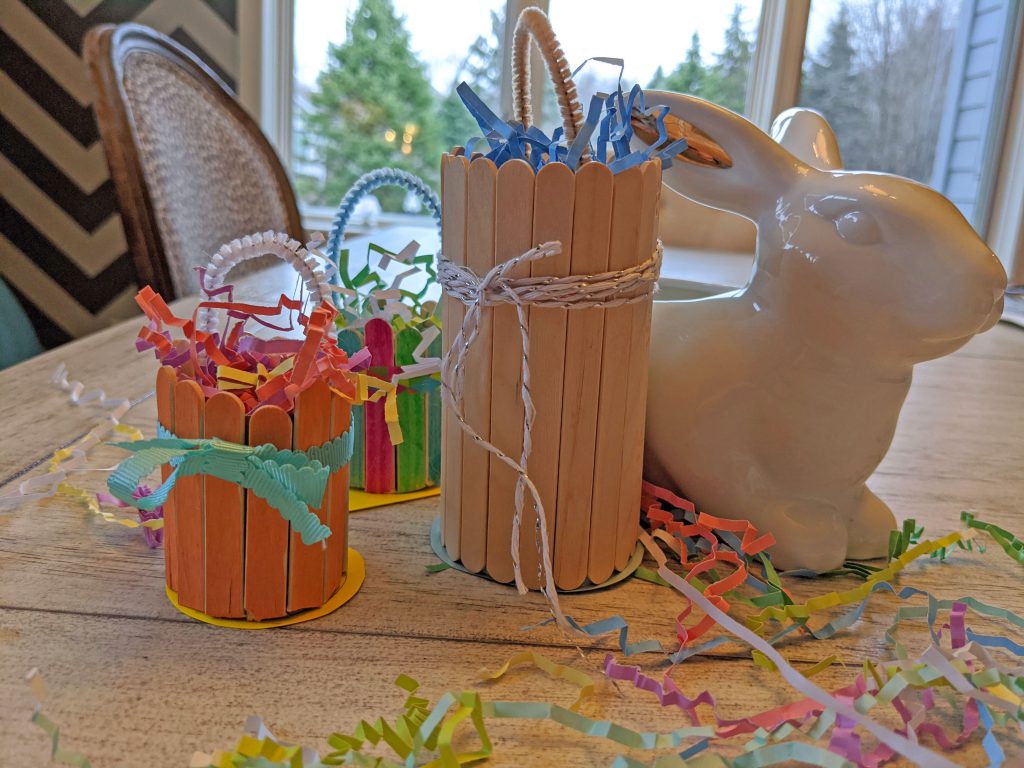
Another option is to be a little greedy and keep them all for yourself. Let’s be honest, they are adorable so you will likely be tempted, like I was, to keep them all and use them as Easter decorations around the house.
There are many ways to make these baskets and I have tried to provide ideas for other options in the below steps. Below I’ve listed the necessities on the top and then provided some other items that are optional when it comes to decorating your baskets.
| Item | Cost |
| Popsicle Sticks | $7.99 |
| Glue | $4.84 |
| Pipe cleaners | $12.49 |
| Card stock | $24.94 |
| Optional Items | |
| Washi tape | $11.99 |
| Markers | $11.99 |
| Chalkboard Markers | $13.95 |
| Ribbon – the ribbon I used was old ribbon I had lying around so here is a link to some cute Easter ribbon | $15.99 |
| String | $6.99 |
| Gems | $5.95 |
And here is your step-by-step guide to making popsicle stick baskets:
1. The first step is to decide how big you want your basket to be! You can make adorable mini baskets by cutting your popsicle sticks in half or you can use the popsicle sticks as their full size (hello extra candy!).
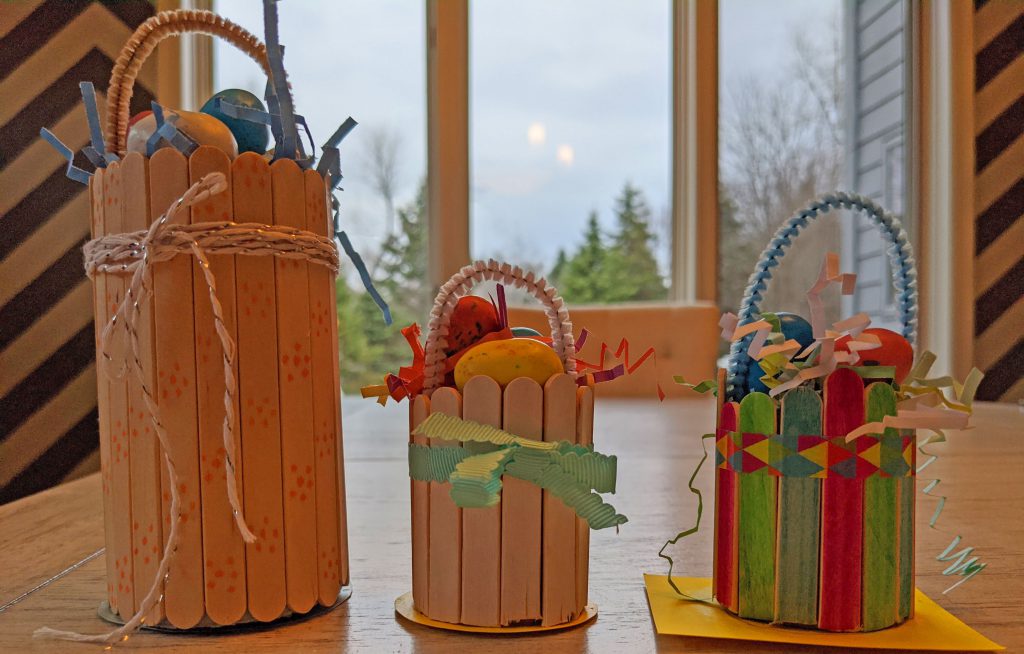
2. Now to make your basket base. Find a piece of card stock. Use your popsicle sticks (mini or full size) to measure the height of the card stock and then cut a rectangular piece out (I used the short side of the card stock, but if you wanted a bigger basket you could use the long side). Shape the card stock into a cylinder and use two pieces of Scotch to hold in place.

Other materials you could use to make a basket base are used toilet paper rolls or used paper towel rolls. I personally am a bit germ averse so I tend to not want to use bathroom items, but you do you and use what you’ve got. These two items are likely already in your house so the upside to using them is they’re free!!
3. Cut a bottom for your basket to make sure all your goodies don’t fall out! The best material I’ve found for this is card stock. You can really use any shape that you want for this so long as the basket base end is totally covered (you don’t want any of those delicious jelly beans to fall out!). If you decide to just go with a circle make sure you make it slightly larger. Once you’ve got your shape cut out, glue it to one end of the basket base.
NOTE: I used a glue stick but found that it did not hold very well so I would recommend that you use liquid glue to ensure it holds.

4. The next step is to color your popsicle sticks. This is an optional step as some of you may prefer the au natural look. If you want to color your sticks (and I would recommend you do if you’re trying to find a craft that takes up more time 😉), you have a few options – you can use markers or you can use paint to color the sticks. Another option would be to buy pre-colored sticks, but what fun is that?!

Rather than coloring the sticks all one color, another option is to color/paint patterns on the sticks. Think flowers, stripes, polka-dots, etc…
NOTE: I tried a few different options when coloring my sticks and the ones I liked the most were actually chalkboard markers. I liked the matte opaque look that they provided.
5. Once you’ve got your sticks colored you can glue them to your basket base. I used a rubber band to hold my sticks in place while they dried.
NOTE: I used a glue stick for my first basket and found that the sticks did not stay put unless I handled the basket very delicately. I used liquid glue on the other baskets I made and would recommend using that as it holds up much better.
6. Once the glue dries you can decorate your baskets! Some recommendations for decorating are: washi tape, ribbon, string, stickers, or gems. I stuck with what I had around the house to try and cut down on costs.
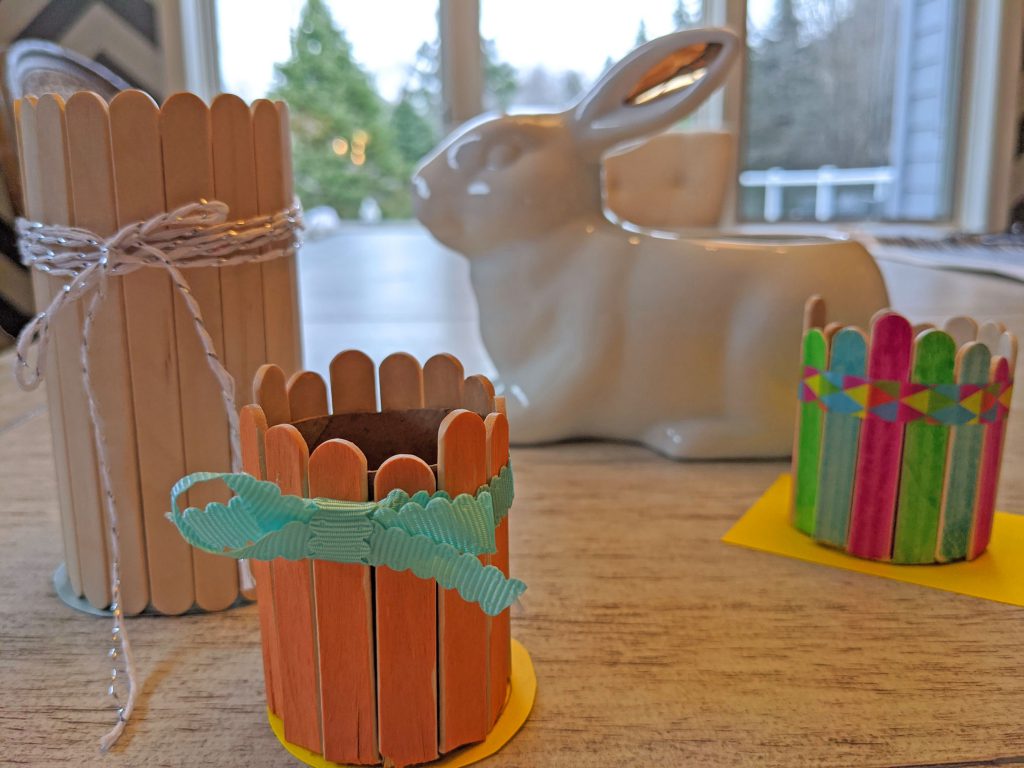
7. After the baskets are decorated you can add the pipe cleaner handle. I cut the pipe cleaners in half and used liquid glue to attach them to the inside of the basket bases.
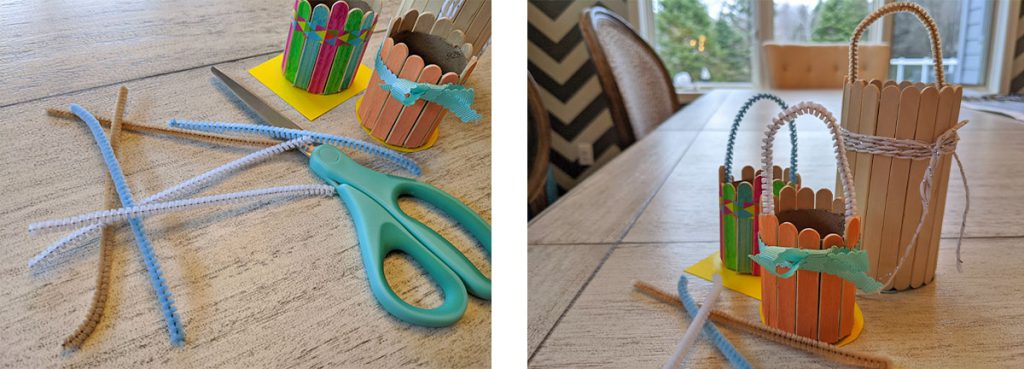
8. And last, but not least, fill these deliciously cute baskets full of Easter grass and candy!
If you don’t already, follow unkrafty on Facebook, Pinterest, and Instagram!
This post may contain affiliate links.
